3D models
Conception in blender
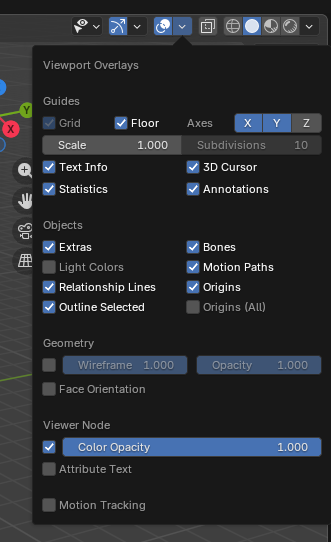
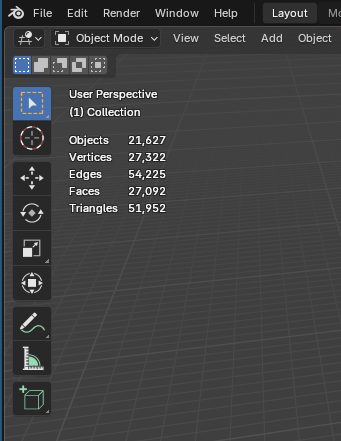
View statistics (number triangles / objects)
In blender, you can see the number of triangles, click on viewport overlays, and click on statictics, you can now see the statistics.
One mesh
Each .blend file must have only 1 mesh, or 1 logical group.
This avoids "who touched what" conflicts in version control.
LOD (Level Of Detail) management
In the goal to keep performance in the game, we need to have 4 LOD.
One you have created your mesh, rename it with the suffix _LOD0.
Duplicate it with alt + D or in menu Object > Duplicate Linked and rename it with suffix _LOD1. Repeat the duplicate for _LOD2 and LOD3.
On _LOD1, _LOD2 and _LOD3, add the modifier Decimate. Apply the ratio like this table:
| LOD | Decimate Ratio | Triangle target |
|---|---|---|
| LOD0 | 1.0 — no decimate | 100% |
| LOD1 | 0.5 | ~50% |
| LOD2 | 0.15–0.2 | ~15–20% |
| LOD3 | 0.05 | ~5% |
textures
Never embed textures inside the .blend, keep them as sidecar files so they can be updated without opening Blender
This is the procedure to manage textures:
When adding a texture the first time, in the Shader Editor, add an Image Texture node → click Open → navigate to your assets_blender/.../ folder and select the .png file there. Blender will store a relative path automatically as long as the .blend has already been saved once alongside the textures.
Check a texture is external (not packed): look at the Image Texture node header. If you see a small floppy disk icon with a dot on it, the image is packed. If it shows just the filename, it's external.
To unpack an already-packed texture:
- Go to File → External Data → Unpack Resources
- Choose "Write files to current directory" (this places them next to the
.blend) - Then move them to your proper
assets_blender/…/folder and re-link (see Files Structure page)
To re-link a texture after moving it: In the Image Texture node, click the folder icon next to the image name → navigate to the new path. Or use File → External Data → Find Missing Files to bulk-fix broken paths across all materials at once.
Make all paths relative (important for team/version control): go to File → External Data → Make All Paths Relative. This converts all absolute /home/you/project/... paths to //relative/... paths, so the .blend works on any machine as long as the folder structure is preserved.
The simplest rule: textures live in the same folder as their .blend, or in a subfolder of it. For your structure that means:
- assets_blender/structures/buildings/houses/
- house_colonial_2f.blend
- tex_house_colonial_2f_albedo.png
- tex_house_colonial_2f_normal.png
- tex_house_colonial_2f_roughness.png
Export to Godot
Once finished, export for Godot.
File > Export > glTF 2.0 (.glb/.gltf)
Choose the format glTF Binary (.glb) (single file, everything packed in. Best for most use cases).
This is the recommended Settings Panel:
🔵 Include
| Option | Setting |
|---|---|
| Limit to | Selected Objects (if you don't want the whole scene) |
| Data > Mesh | ✅ UVs, Normals, Vertex Colors |
| Data > Armature | ✅ Export Deformation Bones Only |
| Data > Skinning | ✅ Enable |
If your model contains blend shapes (shape keys / morph targets), the Data > Armature > Export Deformation Bones Only option must be enabled — exporting non-deforming bones will lead to incorrect shading in Godot.
🟢 Transform
| Option | Setting |
|---|---|
| +Y Up | ✅ Enable this — Godot uses Y-up, Blender uses Z-up |
You can check Transform > +Y Up and other options from the built-in glTF exporter panel.
🟡 Geometry / Mesh
| Option | Setting |
|---|---|
| Apply Modifiers | ✅ Enable (bakes modifiers into the mesh) |
| Normals | ✅ Enable |
| UVs | ✅ Enable |
| Vertex Colors | ✅ if used |
| Compression (Draco) | ❌ Avoid — Godot doesn't support Draco decompression natively |
🟠 Animation (if exporting animated objects)
| Option | Setting |
|---|---|
| Animation | ✅ Enable |
| Export NLA Strips | ✅ Enable — this separates animations by name in Godot |
| Bake Animation | ✅ Enable if you have complex drivers or constraints |
| Sampling Rate | 1 (default is fine) |
| Optimize Animation | ✅ Recommended |
When exporting with animations, use NLA Strips mode — each strip in the NLA Editor becomes a separately named animation track in Godot, which is what allows the AnimationPlayer to recognize them individually.
🔴 Before Exporting — Critical Checklist
- Apply all transforms (
Ctrl+A > All Transforms) on both mesh and armature. Incorrect scale or rotation on an armature is the #1 cause of weird deformation issues in-engine. - Check origin points — objects floating in Godot is often caused by a misplaced origin in Blender.
- Materials: Use Principled BSDF nodes. The exporter supports Metal/Rough PBR (core glTF) and Shadeless (KHR_materials_unlit) materials, and constructs a glTF material based on the nodes it recognizes in the Blender material.
- Textures must be in PNG or JPEG format — other formats are auto-converted on export.
Tip: Save as Export Preset
Once you've configured everything, click the ➕ operator preset button at the top of the export panel to save these settings as a reusable preset (e.g., "Godot Export"). This avoids reconfiguring every time.
Import in Godot
Once 3d model exported, open godot, you will have the file with extension .glb.
Open it, and you will have the import window.
On Scene, be sure to uncheck Generate LODs.
On each MeshInstance3D with the suffix _LOD0, _LOD1, _LOD2 and _LOD3, set the right fields (Visibility Range Begin and Visibility Range End):
| Category | Examples | LOD0 | LOD1 | LOD2 | LOD3 |
|---|---|---|---|---|---|
| Tiny | coins, bolts, leaves | 0–0.5m | 0.5–2m | 2–5m | 5-8m |
| Small | cups, rocks, bottles | 0–1m | 1–5m | 5–15m | 15-25m |
| Medium | chairs, barrels, crates | 0–5m | 5–20m | 20–50m | 50-80m |
| Large | cars, trees, statues | 0–15m | 15–40m | 40–80m | 80-150m |
| Huge | buildings, terrain chunks | 0–30m | 30–80m | 80–200m | 200-400m |
| Massive | mountains, skybox elements | 0–100m | 100–300m | 300–800m | 800-1500m |
Then click on Import or Reimport button.
Practical Tips
- Transparent / alpha objects (leaves, fences) switch to a flat billboard at LOD2 or LOD3